How to Add Velocity on CapCut (2026) | Step-by-Step Tutorial
Ever scrolled through TikTok or Instagram Reels and wondered how creators make those smooth, fast-to-slow motion edits that sync perfectly with the beat? That’s the magic of the velocity effect — and the best part is, you don’t need any complicated software to pull it off. In this guide, I’ll show you exactly how to add velocity on CapCut using simple steps, so you can give your videos that pro-level cinematic touch in minutes!

Overview
Adding velocity on CapCut changes the speed and dynamics of a video clip, creating smooth slow-motion or fast-action effects. To add velocity, users select the clip, choose the speed option, and adjust the speed curve to control acceleration or deceleration precisely.
This feature allows for creative edits by manipulating how the motion looks within a scene, making videos more engaging. Understanding how to use velocity effectively can elevate basic edits into professional-quality content.
Many users find the velocity tool intuitive once they follow a clear step-by-step approach, which helps avoid common mistakes like abrupt speed changes or unnatural transitions.
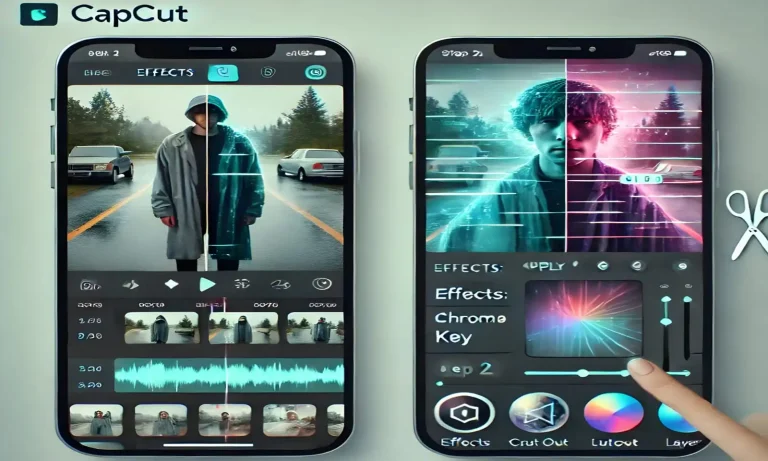
Understanding Velocity Edits in CapCut
Velocity editing adjusts the speed of video clips to create dynamic pacing effects. It involves precise control over acceleration and deceleration, which helps enhance storytelling and visual impact.
Different platforms and devices support CapCut’s velocity features to varying extents. File formats and media types also influence the smoothness and compatibility of velocity edits within projects.

What Is Velocity and Why Use It?
Velocity refers to the rate of change in video speed over time. Instead of a constant slow or fast motion, velocity editing allows smooth speed transitions, like speed ramps.
Users apply velocity edits to emphasize action, create dramatic slow-motion effects, or sync movement to audio beats. This technique adds professional polish to simple footage.
The main benefit is greater creative control over timing. Velocity can highlight specific moments or generate a more engaging visual flow within a project.
Supported Platforms and Devices for CapCut Velocity Edits
CapCut supports velocity editing on both mobile devices and desktop versions, but feature availability depends on system specifications.
Mobile: Most modern iOS and Android devices running recent CapCut updates fully support velocity controls. Older devices might experience lag or reduced precision.
Desktop: Windows and macOS versions offer advanced velocity editing with greater stability and more detailed keyframe management.
Users should update to the latest CapCut version to access all velocity features and ensure optimal performance.
File Formats and Media Requirements
CapCut accepts common video formats like MP4, MOV, and AVI for velocity edits. Files with high frame rates (60fps or above) produce smoother speed transitions.
Using videos with low frame rates may result in choppy slow-motion effects. Resolution also impacts quality—HD or higher ensures clear playback.
Audio tracks must be compatible and properly synced to maintain timing during speed changes. Users should avoid heavily compressed files to prevent degradation during velocity editing.
How to Add Velocity on CapCut: Step-by-Step
Adding velocity changes the speed of a video clip, enabling effects like slow motion or fast motion. The process involves importing the video, accessing the velocity controls, adjusting speed curves, and then reviewing the changes before exporting.
1. Importing Your Video
First, the user must open CapCut and create a new project. Tapping the “+” icon allows them to select the video file from the device’s gallery.
Once imported, the video clip appears on the timeline at the bottom. Users should tap the clip to activate the editing tools.
It is important to ensure the clip is trimmed to the desired length before applying velocity changes to avoid editing unnecessary footage.
Accessing the Velocity Tool
After selecting the clip, the user taps the “Speed” button in the toolbar. This opens the speed adjustment menu.
Within this menu, “Curve” mode enables velocity control. Selecting “Curve” grants access to velocity presets and the ability to create custom speed ramps.
This feature allows for variable speed changes over the duration of the clip rather than uniform speed adjustments.
2. Adjusting Velocity Curves
Users can choose from preset curves such as “Ease In,” “Ease Out,” or “Fluctuate.” These presets adjust speed smoothly based on predefined acceleration and deceleration values.
For custom curves, users drag control points on the graph to set precise speed changes at specific times. The vertical axis represents speed, while the horizontal axis represents time.
Adjusting curves helps create natural motion effects, such as gradually speeding up or slowing down sections of the clip.
3. Previewing and Exporting Your Edited Video
Once the velocity curve is set, users tap the play button to preview the effect within the timeline.
If satisfied, they tap the export icon in the top right corner. Export settings include resolution and frame rate options.
Selecting “Export” saves the video with velocity edits applied, ready for sharing or further use.
Advanced Velocity Editing Tips and Techniques
Velocity editing can be enhanced with precise control using keyframes, creative combinations with transitions and effects, and careful adjustments to preserve video quality. These strategies help create professional and smooth motion changes in CapCut.
Using Keyframes for Dynamic Effects
Keyframes allow precise adjustments of speed within specific segments of a clip. By placing keyframes at different points on the timeline, users can change velocity gradually or sharply. This creates dynamic speed ramps rather than abrupt cuts.
In CapCut, tapping on the clip and selecting the keyframe icon enables this feature. Users can then drag the velocity curve between keyframes to accelerate or decelerate smoothly. This technique is ideal for creating slow-motion highlights or fast-forward sequences within one clip.
Using multiple keyframes closely spaced can simulate complex motion patterns or mimic natural speed changes found in real life. Adjusting ease-in and ease-out curves at each keyframe further refines the effect.
Combining Velocity With Transitions and Effects
Velocity changes become more impactful when paired with transitions and other video effects. For example, slowing down a clip right before a dissolve transition can enhance the fluidity between scenes.
Using effects such as blur, zoom, or color grading alongside velocity ramps emphasizes motion and draws viewer attention. CapCut’s built-in effects library allows users to layer these treatments efficiently.
A practical tip is to adjust velocity first and apply transitions afterward, ensuring both align for a seamless look. It is important to preview the combined impact regularly to avoid jarring changes or quality loss.
Optimizing Video Quality After Applying Velocity
Applying velocity changes can sometimes introduce frame stuttering or reduced clarity. To counter this, users should export clips in their highest original resolution and format before velocity editing.
Within CapCut, selecting frame interpolation options, if available, smooths out motion between frames. Users can also manually adjust speed increments to avoid extreme jumps that might degrade visual fidelity.
Finally, proper lighting and shooting at higher frame rates initially reduce quality loss when slowing down or speeding up footage. Optimizing editing settings after velocity manipulations ensures a clean, professional final video.
Some velocity edits may cause rendering errors or affect app performance depending on the device. Addressing these issues involves specific fixes related to rendering and system optimization.
Troubleshooting Common Issues With CapCut Velocity Edits
1. Resolving Rendering Errors
When velocity edits fail to render, the project file might be too complex or contain unsupported formats. Users should first check if all video clips are compatible with CapCut’s supported formats, like MP4 or MOV.
Clearing cache and restarting the app often resolves minor glitches. If errors persist, reducing the number of velocity points or simplifying the speed curves helps. Exporting the video at a lower resolution can also decrease rendering load while testing.
Finally, updating CapCut to the latest version ensures all rendering bugs and compatibility issues are patched.
2. Performance Optimization on Different Devices
Low performance during velocity edits usually stems from insufficient processing power or limited RAM. On Android and iOS, closing background apps improves available resources.
Reducing the preview quality in CapCut’s settings minimizes lag without affecting final export quality. For older devices, keeping velocity edits less complex—using fewer speed changes in the timeline—helps maintain smooth playback.
Heavier edits are better handled on devices with newer processors and at least 4GB of RAM. Regularly updating the device’s OS also contributes to better hardware support and app performance.
Final Thoughts
And there you have it — adding velocity on CapCut is much easier than it looks! Whether you’re aiming for smooth slow-mo effects or dramatic speed ramps synced to music, this feature can instantly level up your video edits.
The best part? You don’t need fancy tools or a PC setup — just your phone and a bit of creativity. So go ahead, experiment with different speeds, and make your edits stand out on TikTok, Instagram, or YouTube. Happy editing!